Post Sections ⇅
- Video Recording Software
- Video Editing Software
- Get Set Up
- Record It… Multiple Times
- Trim It Carefully
- Let’s Make that Gaming Animated GIF (at last!)
- Other Optional Tweaks
- Get Sharing on Social Media!
- Why Keep to Emotes?
- TL;DR Creating Gaming Animated GIFs is Much Fun!
So, I want to look at how you can make gaming emote GIFs for free. And I will look at both SWTOR and LOTRO here, but the process outlined can apply to any game.
Video Recording Software
The first step requires us to be able to record a very short video. As neither SWTOR nor LOTRO have in-built video recording options, we have to find these ourselves. These are the three programs I have used:
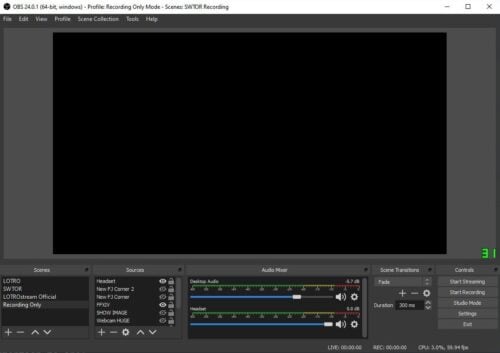
OBS Studio
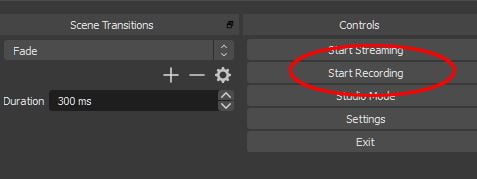
All I would say is, for the purposes of making animated GIFs, ensure you’ve hidden any layers, frames, webcam overlays that you would have up normally during a stream. We want the game and nothing but the game here.
Bandicam (Free)
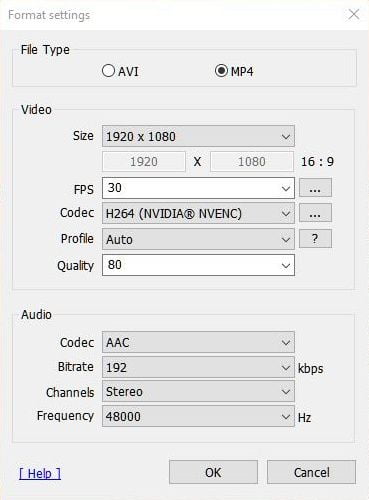
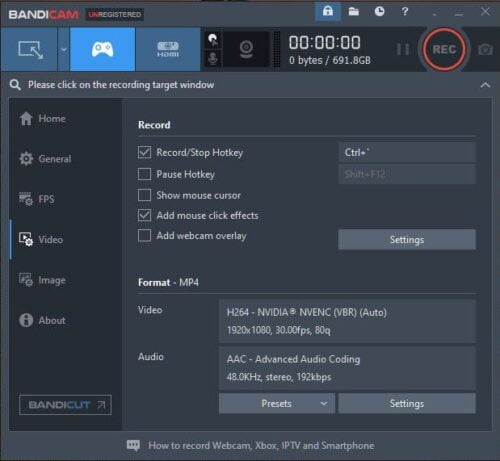
The free version of Bandicam adds a watermark over videos. BUT never fear you won’t have a watermark on your animated GIFs by the time we’re done! Once you’ve downloaded and installed Bandicam, make sure it’s running in your system tray. Then head to the Video Settings screen. Settings you should pay attention to are:
- Your record stop/start key: you’ll need this when you want to record in-game. Be careful not to choose a keybind that already does something in-game. This is why mine seems random (Ctrl and ‘)
- Untick “Show Mouse Cursor”: if you’re making a GIF you won’t want your cursor showing. Remember to tick this again, if the next video needs this feature.
- Ensure you’re using mp4 format: I’ve also restricted it to 30FPS because for this purpose you don’t need any more than that.
Their sister product, Bandicut, used to be great as a free version. But since I last tried their free version, instead of adding a watermark over the video, they add extra video ‘ad’ on the end of the processed video. For animated GIFs this is not appropriate, so steer clear!
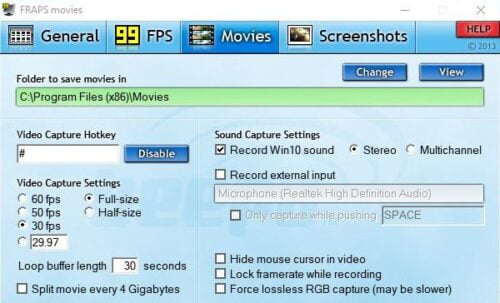
FRAPS (Free)
Linux
Linux has a few options, but I can’t pass an opinion on them. Except the one that I use Simple Screen Recorder. This is available as a Snap and through official repos. After moving to Linux a year and a half ago, it took me a while to find replacements for some of my Windows-only apps. But this one does the job just fine!
Video Editing Software
If short cutscenes and emote recording are all you ever want to record, then you don’t need much from any video editing platform. In terms of animated GIFs, all you need is
- To be able to increase the brightness: in case you’re recording during in-game night time or underground.
- To be able to trim your video down to a few seconds.
Free Video Cutting Software
Some options are:
Windows Movie Maker
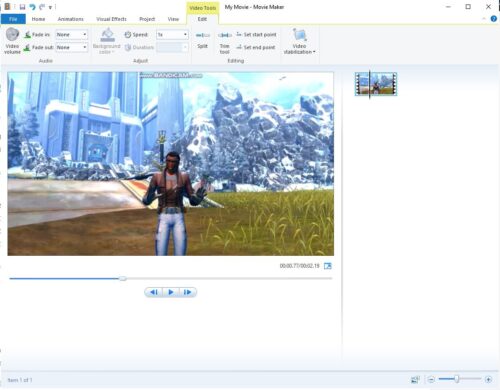
Windows Live Essentials is no longer shipped with Windows by default. However, I used to use Windows Movie Maker when making GIFs as it’s just so easy. Download from CNET.
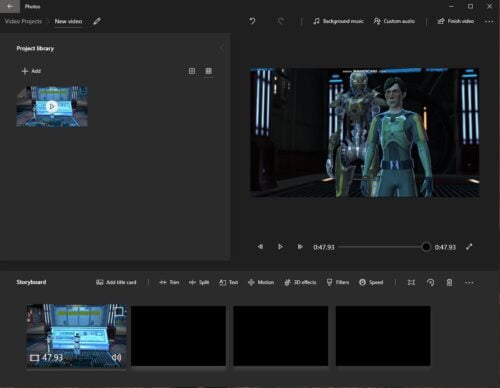
Windows 10 Photos App
Yes, despite its name the “Photos” app in Windows 10 can be used for basic video editing. You can trim the video down, add text and other basic operations. What I don’t think it can do is increase the brightness, which Movie Maker does. Though you may find one of the filters does the job well enough.
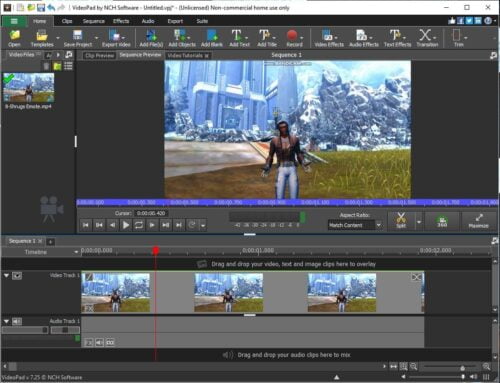
VideoPad Video Editor
This is more a full featured video editor. But it includes filters you may want to use to improve or alter your videos. It is free for personal/non-commercial purposes – which once you install it, you’ll realise how much they give away. Don’t try to sell your animated GIFs or the service of making them and you’re good! Download it from here.
Get Set Up
So you’ve decided on your platform of choice and, hopefully, know what’s required to start (and stop) recording. The next step is to ensure you’re properly set up.
1. Check Your Recorder Is Running
I wish I was joking. I’ve missed recording opportunities because I didn’t realise Bandicam wasn’t, in fact, running in the background!
If your chosen software sports an in-game overlay or a system tray icon, it may be wise to show that for now.
2. Know How to Hide Your UI
Each game is different – unless you’re like me and roll out most shortcuts to all your games. You won’t want your UI showing when recording an emote GIF. Make a note of what that keybind is.
3. Decide On the Emote
Firstly you’ll want to work out which emote to show. Both SWTOR and LOTRO have extensive menus dedicated to the various emotes you can use. Details for both games are below.
4. Know How Do to Trigger Your Emote
In both SWTOR and LOTRO you can trigger an emote by using a chat command. e.g. /laugh, /point, /cheer. LOTRO has the additional bonus that you can slot an emote to your quickbars. This makes is super-easy to keybind that action instead of relying on typing it. Incidentally, FFXIV lets do you do this too. Just use a spare quickslot bar for this purpose..
↑ Post Sections
Record It… Multiple Times
Right let’s get on and record the video version of our emote. You should start recording before you trigger the emote and stop it way afterwards. Don’t worry we’ll trim it down later. As options are different in SWTOR and LOTRO, choose the tab that suits you.
Find Your Unlocked Emotes
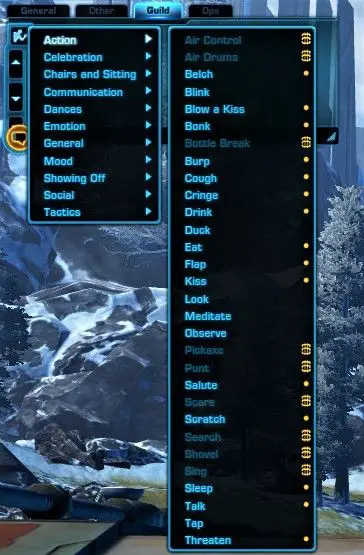 Unlocked (and in fact, locked) emotes are found in the top left at the chat panel. Assuming you haven’t moved the chat panel.
Press the emote button and then work your way through the menu system to find which are available. Emotes may be unlocked from GTN or via the Cartel Market.
Click or Chat Command?
It’s up to you whether you want to navigate the menu system while recording or not. You may find that checking the correct chat command is easier. Just a suggestion, do what’s easiest for you.
Recording Video in SWTOR
- Start the recording with your keybind.
- If using chat commands put the command in, but don’t press Enter just yet.
- Next you need to do two things, quickly: press enter and immediately hide the UI.
- If your chosen emote doesn’t loop, repeat steps 2 and 3. Ensure your emote is recorded at least twice in your one video.
- Stop the recording.
Choose Your “Trigger”
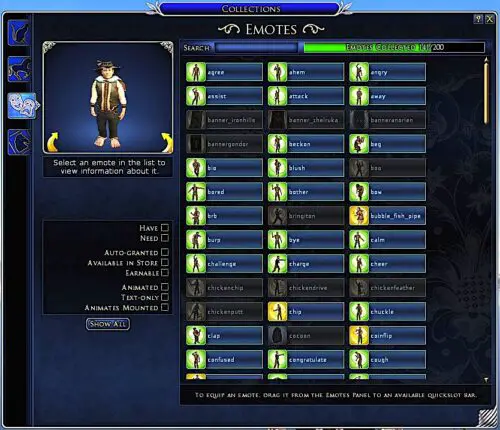
LOTRO has an additional Emotes panel in Collections, allowing you to easily preview all your unlocked (and locked) emotes.
When it comes to recording it, you can choose your “trigger”:
- Quickslot: Click or the keybind that relates to its slot.
- Menu: You can navigate the many levels of menu and click the one you want. However this list is not complete, but I believe all items in this menu are available for free so don’t need unlocking.
- Chat Command: once you’ve checked which command is correct, simply enter that into chat. This is in the form of /emote_name.
Note: There are no spaces in the emote chat command, so you may need to check LOTRO Wiki.
Recording Video in LOTRO
- Start the recording with your keybind.
- If using chat commands put the command in, but don’t press Enter just yet.
- Chat Command Method: Next you need to do two things, quickly: press enter and immediately hide the UI.
- Quickslot Method: Hide the UI, then press the keybind that matches the quickslot.
- Menu Click Method: Navigate to the emote, click your emote and immediately hide the UI.
- If your chosen emote doesn’t loop, repeat steps 2 and 3. Ensure your emote is recorded at least twice in your one video.
- Stop the recording.
Trim It Carefully
Once you have your video, you want to only keep the portion containing the the whole emote. I say that because, say, arms moving up to wave and back down again may need to be kept in. Basically you want as near to a seamless loop as possible in your video.
Use your choice of video editor/cutter to find the ideal starting and ending points. Save the “middle bit” to a separate mp4.
Let’s Make that Gaming Animated GIF (at last!)
Now you’ve done a shedload of preparation, we can finally head into the final stage of making the Animated GIF.
For this stage, I’m going to introduce my favourite free website I use for this purpose: EZGif.com. But don’t start at their homepage, I’ll explain why.
1. Upload Your Emote Video
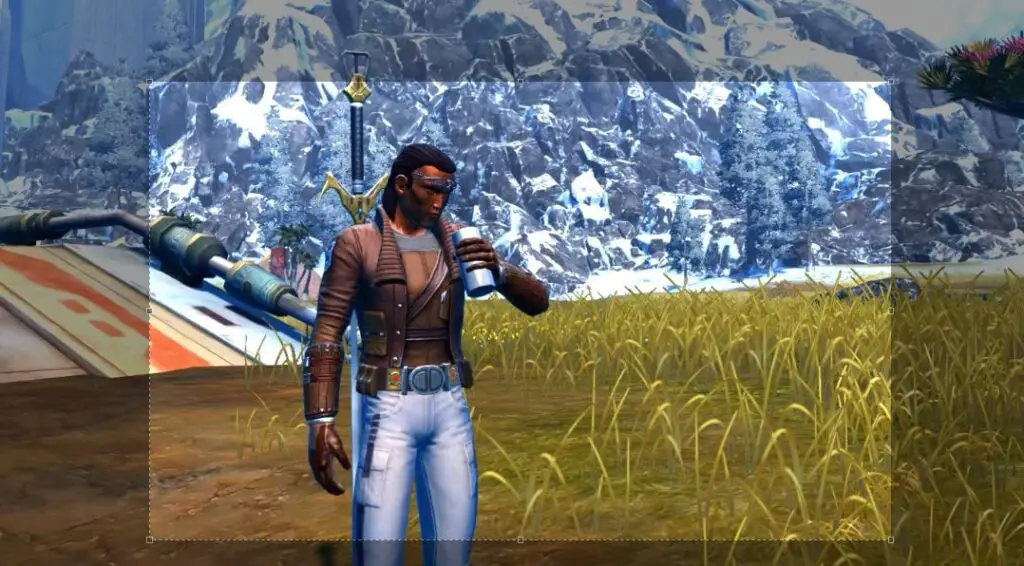
Gaming emotes may require the whole body to be showing. In terms of a whole-screen video this is not a large proportion of the screen. So we want to zero in on the character themself. So head to the crop video tool.
Select Image Ratio
Before you choose which part of the video you want to keep, scroll down the page to these settings: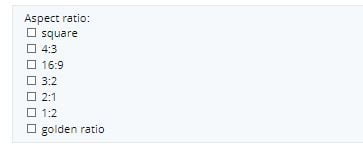
Which aspect ratio should you choose? Well, I think technically Twitter is 2:1 ratio, but that can always change in the future. I’ve found 2:1, 4:3 and golden ratio have all worked fine when I’ve tweeted the animated GIF out. See Canva’s excellent article on the Golden Ratio for more on this.
2. Crop Your Video
Once you’ve uploaded your video, you’ll see your video constantly looping. You may wish to mute your browser’s tab if your video also has audio repeating every few seconds!
With your aspect ratio chosen, drag an area around your character.
Adjust it until you’re happy you’ve framed them well then press the Crop Video button. If your video recording left a watermark, cropping your character here should exclude the watermark. Hurrrah!
3. Animated GIF (Stage 1)
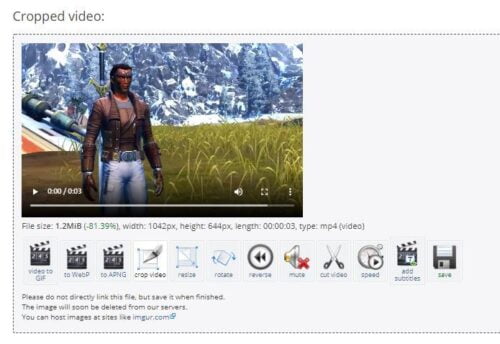
Once the site has processed your cropping, this section appears further down the page:
You can continue with edits, or you can make your first “draft” GIF. Simply hit the “Video to GIF” button:

4. Optimise Animated GIF Settings
The last major stage is to optimise it. What do I mean by that?
- Minimise the file size
- Make the GIF as efficient as possible
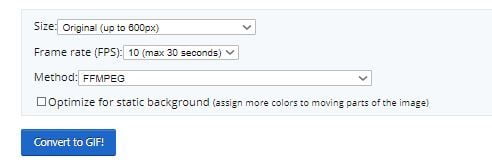
So, the first part of this takes place on this screen:
Usually the only thing I change is to tick “Optimize for static background”. This focuses the quality on the moving parts of the animated GIF. I probably should have said record with a non-moving background earlier. Well, I’ve said it now, ha. Decide if you want a specific width for your GIF, tick that box and press “Convert to GIF”.
5. Final Optimisations
When you initially convert your mp4 to gif, you’ll likely get the message: “We advise you to optimise the GIF”. My initial filesize here is over 5Mb, so that advice is spot on!
Click the link to open up your options:
I usually just use lossy compression at a low-ish level of compression. But you may find the “remove duplicate frames” works for you depending on the emote. Your uncompressed animate GIF remains on the page, with the optimised one loaded below. This lets you compare the two as you tweak the settings.
6. Save It!
Once you’re happy with the compressed/optimised version hit the save button:
Other Optional Tweaks
There are a couple of bits you can do when creating gaming animated GIFs.
- Speed It Up: People don’t watch GIFs for a long time. They’re quick-impact. On the flip side, not all emotes are over in one second. For this reason I try to make emote GIFs a maximum of 3-4 seconds. You may need to speed up the video to achieve this.
- Add a Caption: If your emote is also a meme, you may wish to add a caption.
- Colour Balancing: I’ve mentioned brightness, but you may wish to adjust the focus, or colour saturation, or even make it greyscale. Where possible do these things in the game to minimise video editing time.
All these things can be done in EZGIF.com. To adjust the colours, use the “Effects” button.
↑ Post Sections
Get Sharing on Social Media!
Well done! You can now get on and share your new animated GIF, or meme, on your social media platform of choice. Have fun with it, and do tag me when you share your creations.
Why Keep to Emotes?
Once you’ve done emotes, there are so many more options in games! A flowing waterfall, some gears grinding away, a backbroken miner, a combat animation. You just have to have a little imagination and also to keep your eyes open to opportunities out there.
TL;DR Creating Gaming Animated GIFs is Much Fun!
I can get a little addicted to doing this! It may have felt like a long process but once you’ve done it a few times, it actually just takes a few minutes. Have fun creating your gaming animated GIFs – fun is the point after all!
